Five Weekend Builds From Ordinary Yard Stock (No Milling, No Waiting)
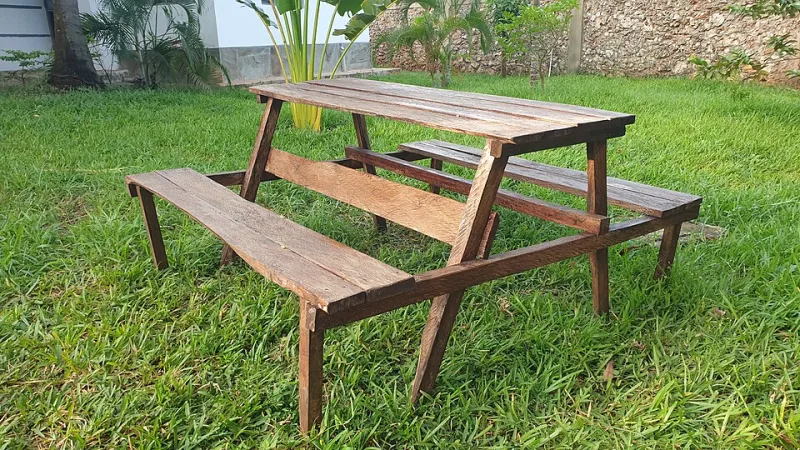
Photo: Tall Black, CC BY-SA 4.0, via Wikimedia Commons
A good weekend project shouldn't come with a six-week lead time. If a build needs bespoke milling, a specialist order or a van hire, it's not a weekend build — it's a project, and it'll still be half-finished when the clocks go back.
Everything below is built from stock sizes we keep in the yard all year: 47x100, 47x47, 75x75, 19x94, 28x145 decking, 18mm OSB or ply, and featheredge. No joinery shop required. A cordless drill, a saw, a square and a bit of patience will do it.
1. Planter screen — beginner, one day
Materials: four 75x75 posts at 1.8m, 47x100 for rails, 19x94 slats, a roll of liner, gravel, coated screws.
Skill: beginner. If you can drill a straight pilot hole, you're qualified.
This is the answer to a wheelie bin, a heat pump or a neighbour's trampoline. Build a simple slatted screen between four posts and run a planter box along the base — the planting softens the bottom and hides the feet.
Straight talk: people overspend on 'planter timber' and interlocking panel kits. A plain slat screen costs a third of that and looks better after two years, because there's nothing fancy to fall apart. Line the planter box properly rather than shoving soil straight against the wood, and leave 5mm gaps between slats so wind can pass through instead of pushing the whole thing over.
Neighbour note: if it's within two metres of the boundary, keep it under two metres high. Go over and you're into planning-permission territory, which is a much longer conversation than the one about the trampoline.
2. Boot rack — beginner-plus, half a day
Materials: 47x47 battens, 19x94 for the shelf, 25mm dowel, wood glue, 40mm screws.
Skill: beginner-plus — one or two angled cuts, nothing scary.
A slatted shelf at floor level, a rail above it with dowels poking up at a slight angle, and a drip tray underneath. Half a day, including the trip to the yard.
Straight talk: the overspend here is buying a flat-pack kit. Dowel is pennies. Cut it at a slight upward tilt so boots drain back towards the heel rather than onto your floor — a small detail that prevents a great many domestic discussions.
3. Garden bench — intermediate, a weekend
Materials: 47x100 for legs and frame, 28x145 decking boards for the seat (or 19x94 if you want a lighter look), 47x47 for back supports, stainless or heavily coated screws.
Skill: intermediate. Straight cuts, a few notches, and a bit of care squaring the frame.
Straight talk: people over-order hardwood and under-order fixings. A bench built with cheap screws is a bench with rust streaks down the legs by year two, so buy stainless or properly coated and don't wince at the price. Leave a 4–5mm gap between seat boards so water runs off rather than pooling, and give the feet a couple of inches of clearance off the patio so the end grain isn't sitting in a puddle.
4. Shed shelving — beginner, an afternoon
Materials: 47x47 uprights, 47x100 for bearers, 18mm OSB or 12mm ply for shelves, 75mm screws.
Skill: beginner. This is the project you do instead of tidying the shed.
Fix uprights to the studs, run bearers across, screw the shelf down. Two tiers and you've doubled the usable space in an afternoon.
Straight talk: don't span more than about 600–700mm of 18mm OSB without a bearer under it, especially if you're storing paint tins. And screw the bearers into the shed's studs — fixing into cladding alone is how shelves end up on the floor. The classic overspend is a heavy-duty adjustable shelving system in a shed. It's a shed. It's holding a strimmer.
5. Log store — intermediate, a day and a bit
Materials: 75x75 corner posts, 47x100 rails, featheredge or 19x94 slats for the sides, OSB or corrugated sheet for the roof, a bag of gravel.
Skill: intermediate. It's basically a small, open shed.
Straight talk: the mistake isn't the build, it's sealing it up. Logs need air moving through the stack, so slatted sides, an open front and a roof with a decent overhang. A tarp thrown over a stack is a rot blanket. Sit the whole thing on gravel or bearers so the bottom row isn't drinking from the ground, and size it for roughly a winter and a half of burning — better a bit spare than a February scramble.
Buying notes worth two minutes
Buy all your timber in one go, from the same batch, so the colour and moisture match. Add about ten per cent for waste and the odd cut you'd rather forget. Sight down every length before it goes on the trolley — a bowed board is a bowed board, and it's easier to swap it in the rack than on your patio. Once home, store it flat, stickered with offcuts, out of the rain, and let it acclimatise for a couple of days before cutting.
Finishing, and keeping the peace
Oil or a breathable stain on anything you'll touch or sit on; leave structural timber to weather. And on the neighbours — saw at a civilised hour, don't fire up the circular saw at eight on a Sunday, and sweep up the sawdust. Cutting outdoors, everyone within three gardens knows exactly what you're doing and roughly how tidy you're being about it.
We keep all of the above in stock most weeks. Bring your measurements and we'll help you work out the cut list before you buy, which is the cheapest favour anyone in a timber yard can do you.